This is an example of using Kyma to control Resolume Avenue to launch and mix video clips and atemOSC to switch live video sources using an ATEM Mini.
After starting your Pacamara and Kyma, open the Notebook Avenue ATEM OSC Configuration.kyt (found in the Notebooks folder of the Kyma 7 Folder). Although Kyma automatically receives OSC messages, before it can send OSC messages to an application or device, Kyma must first receive an example of each OSC message that you would like Kyma to be able to send. This notebook sends Kyma a list of OSC messages as if they came from the application or device at its associated IP address and port number. You can re-evaluate the code in the notebook at the start of each session to configure bidirectional OSC communication.
Then go to the DSP Status window, select OSC from the Configure drop down menu and click the View log button.
Next, power up the ATEM Mini and launch the atemOSC application. The first time you use atemOSC, you have to give atemOSC the IP address of the ATEM Mini switcher and the IP address of the Pacamara.
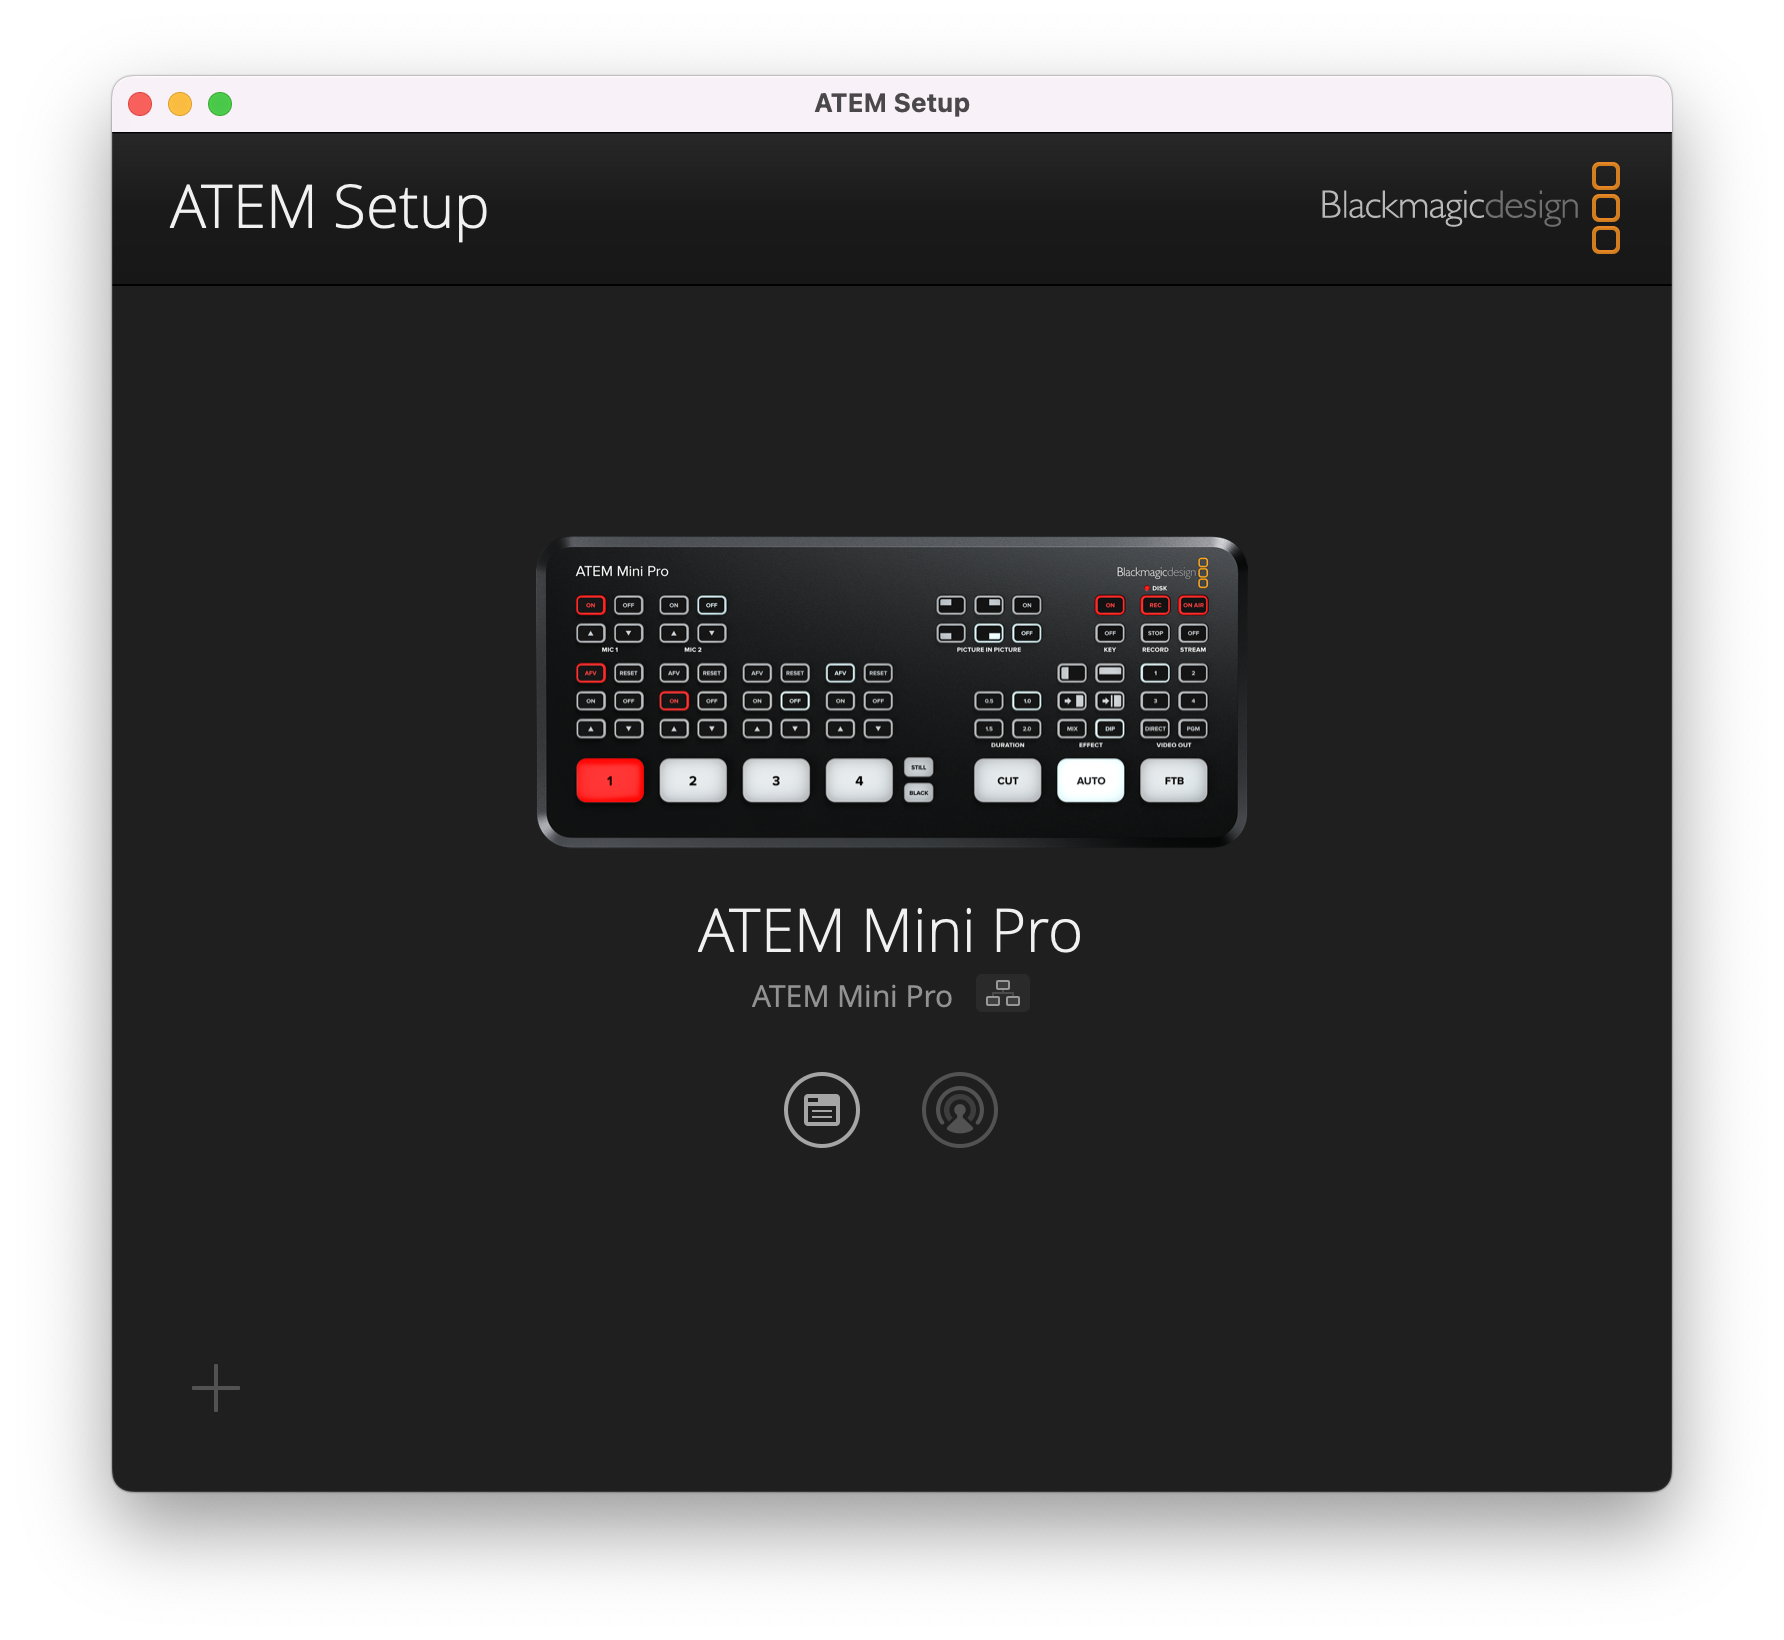
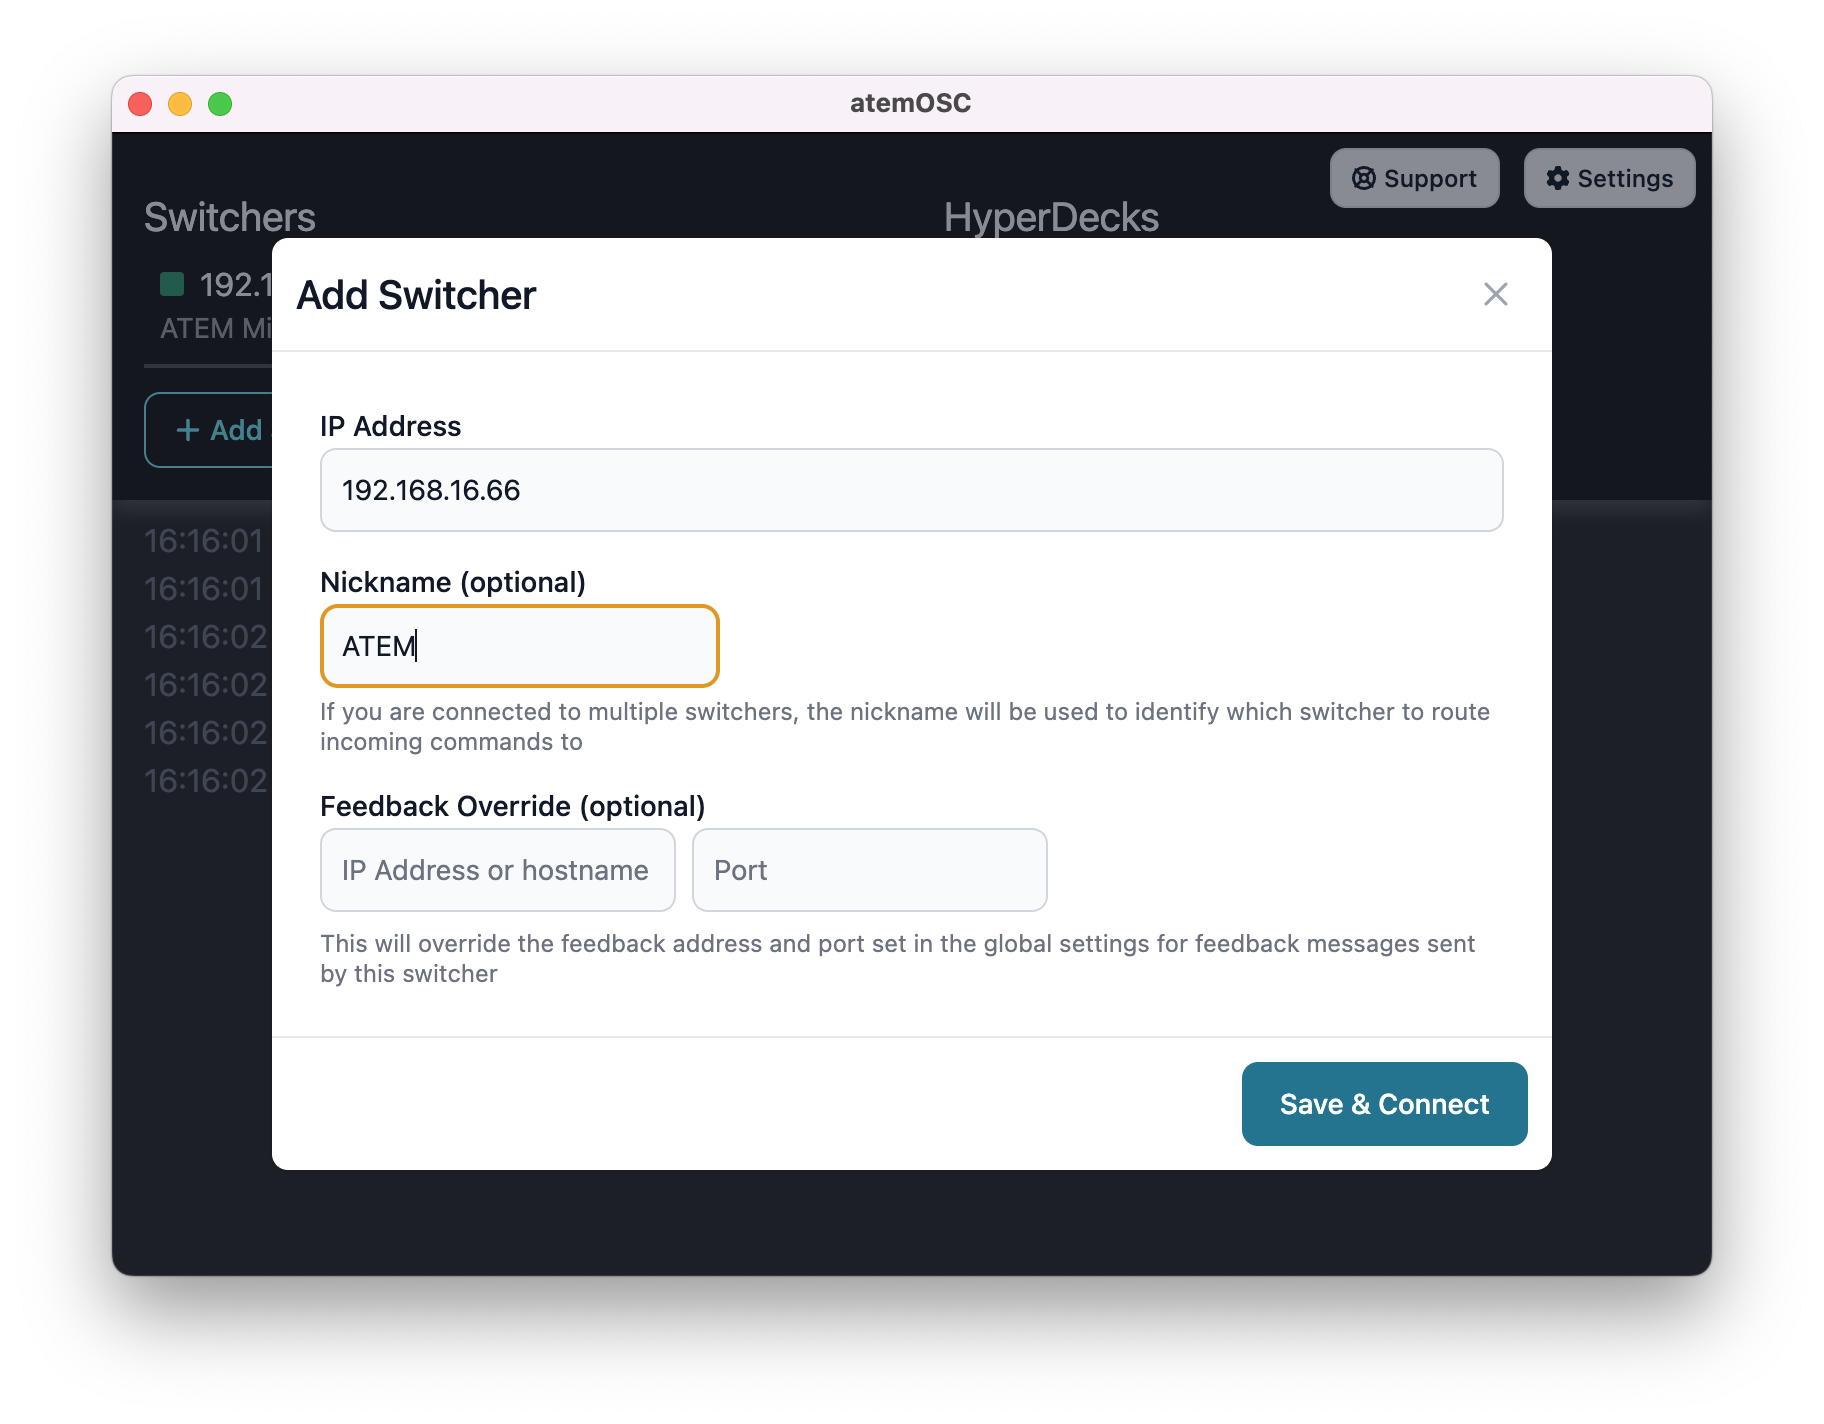
To give atemOSC the IP address of your ATEM Mini switcher, click the + Add Switcher button and enter the IP address of your ATEM Mini and give it the nickname ATEM. You can find the IP address by starting the BlackMagic ATEM Setup application and clicking the Configure button (the circle at middle left, highlighted below):
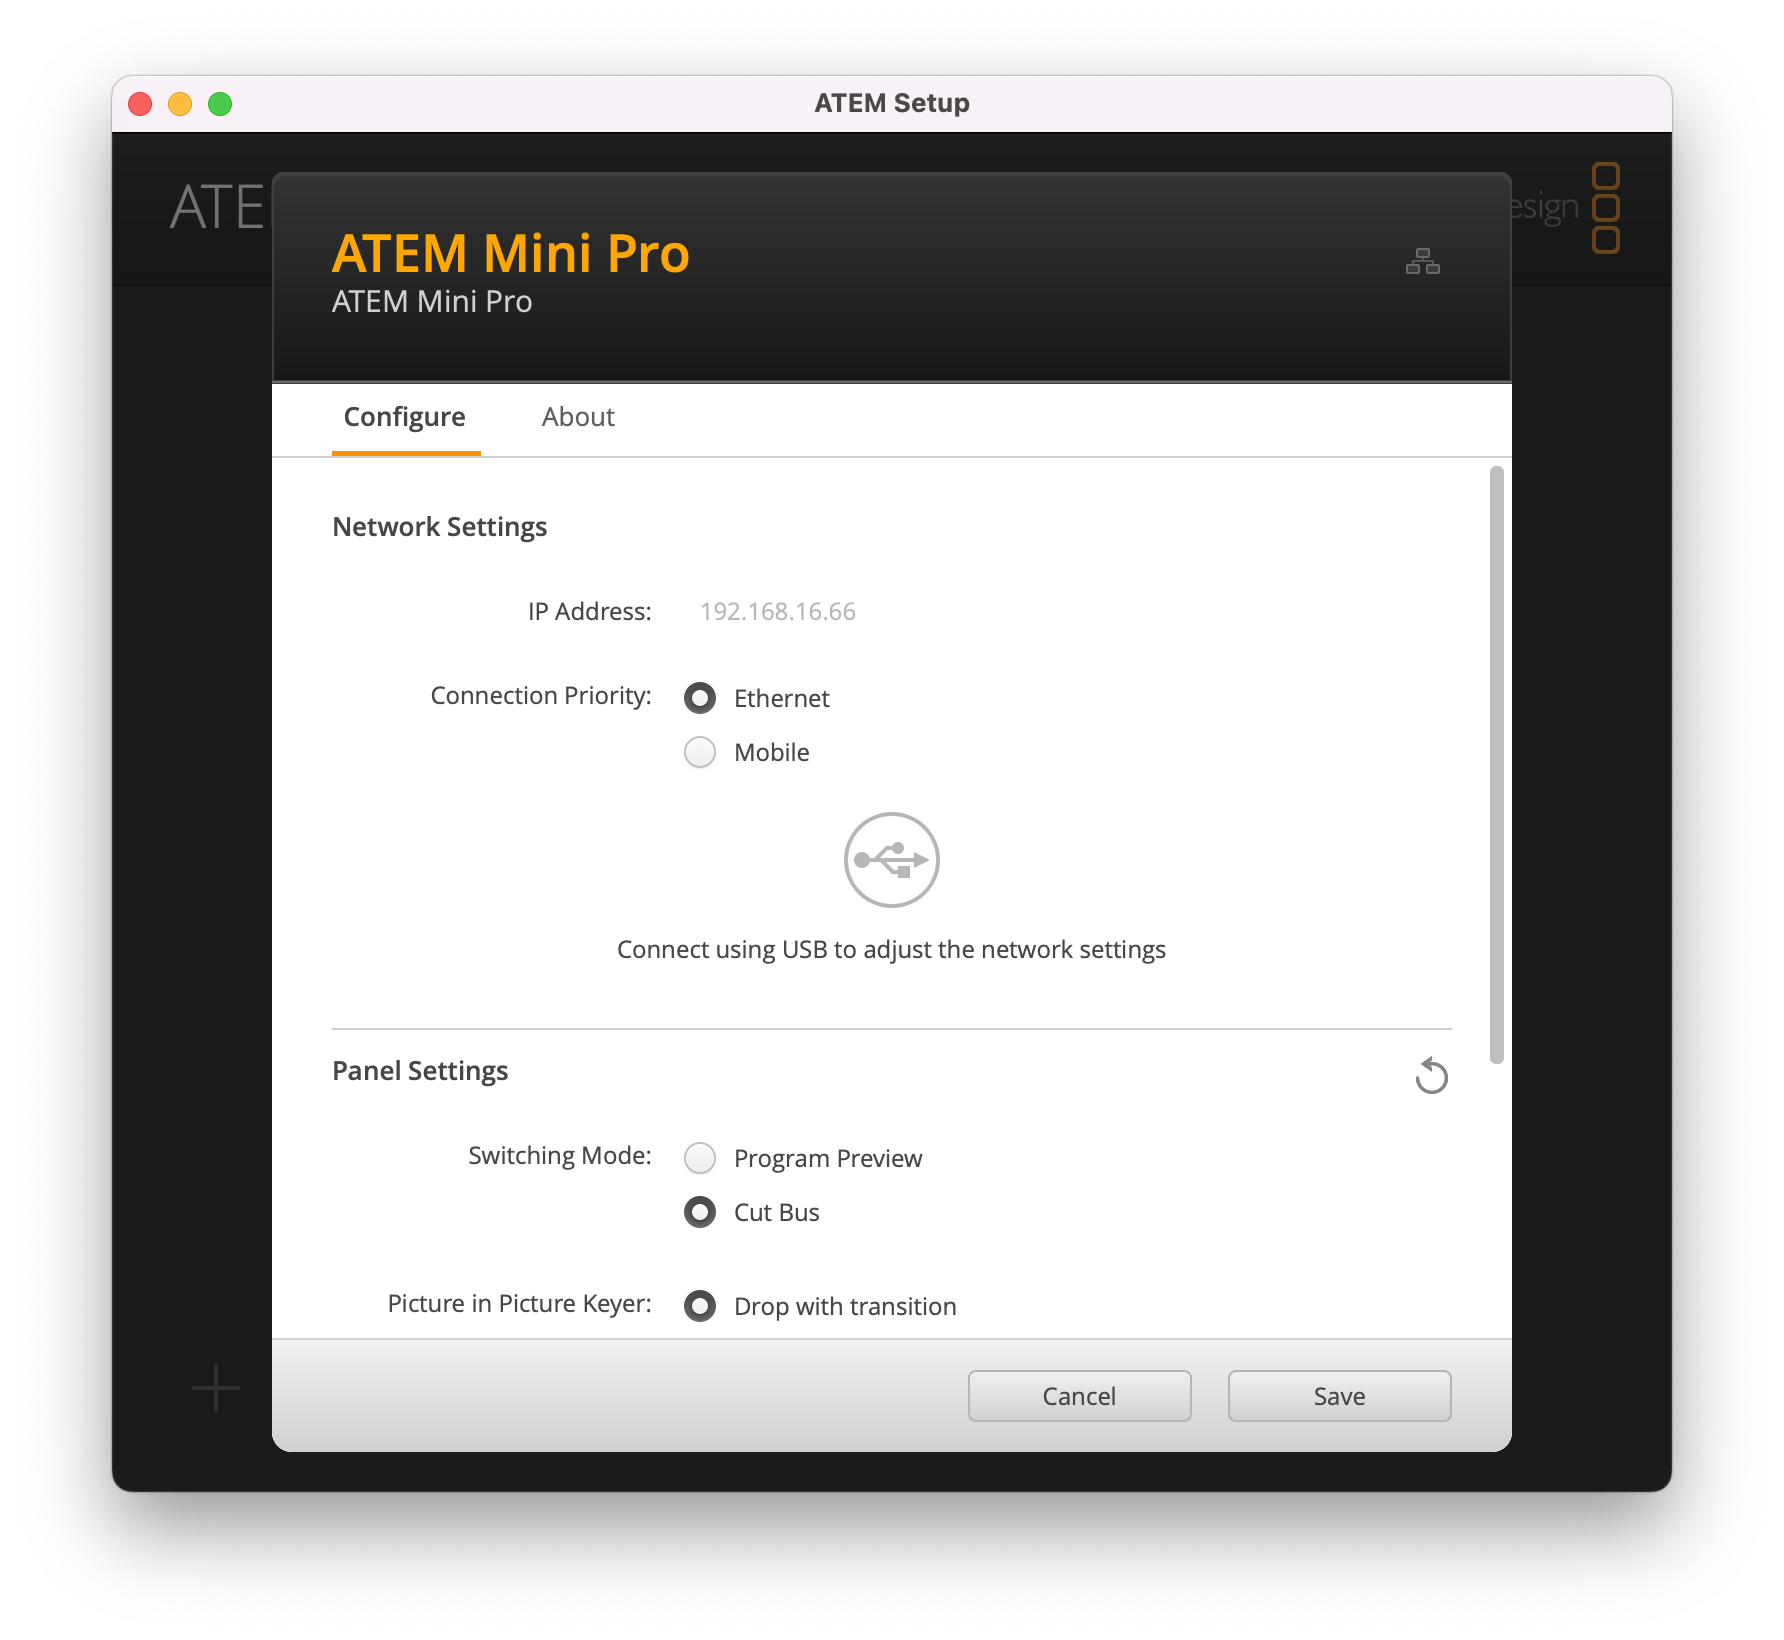
Write down the IP address shown under Network Settings. In this example (see below), it is 192.168.16.66. Your number will be different and, if you do not have a DHCP server on the network connecting your computer and ATEM Mini, this number will be different each time you start up either your computer or ATEM.
Quit ATEM Setup and return to the Add Switcher page in atemOSC, enter the IP address of your ATEM switcher and click Save & Connect. For example:
If the ATEM Mini is not powered up and connected, or if the IP address is no longer valid, the green square to the left of the IP address will turn red. To update the ATEM switcher IP address, use the blue gear button in atemOSC.
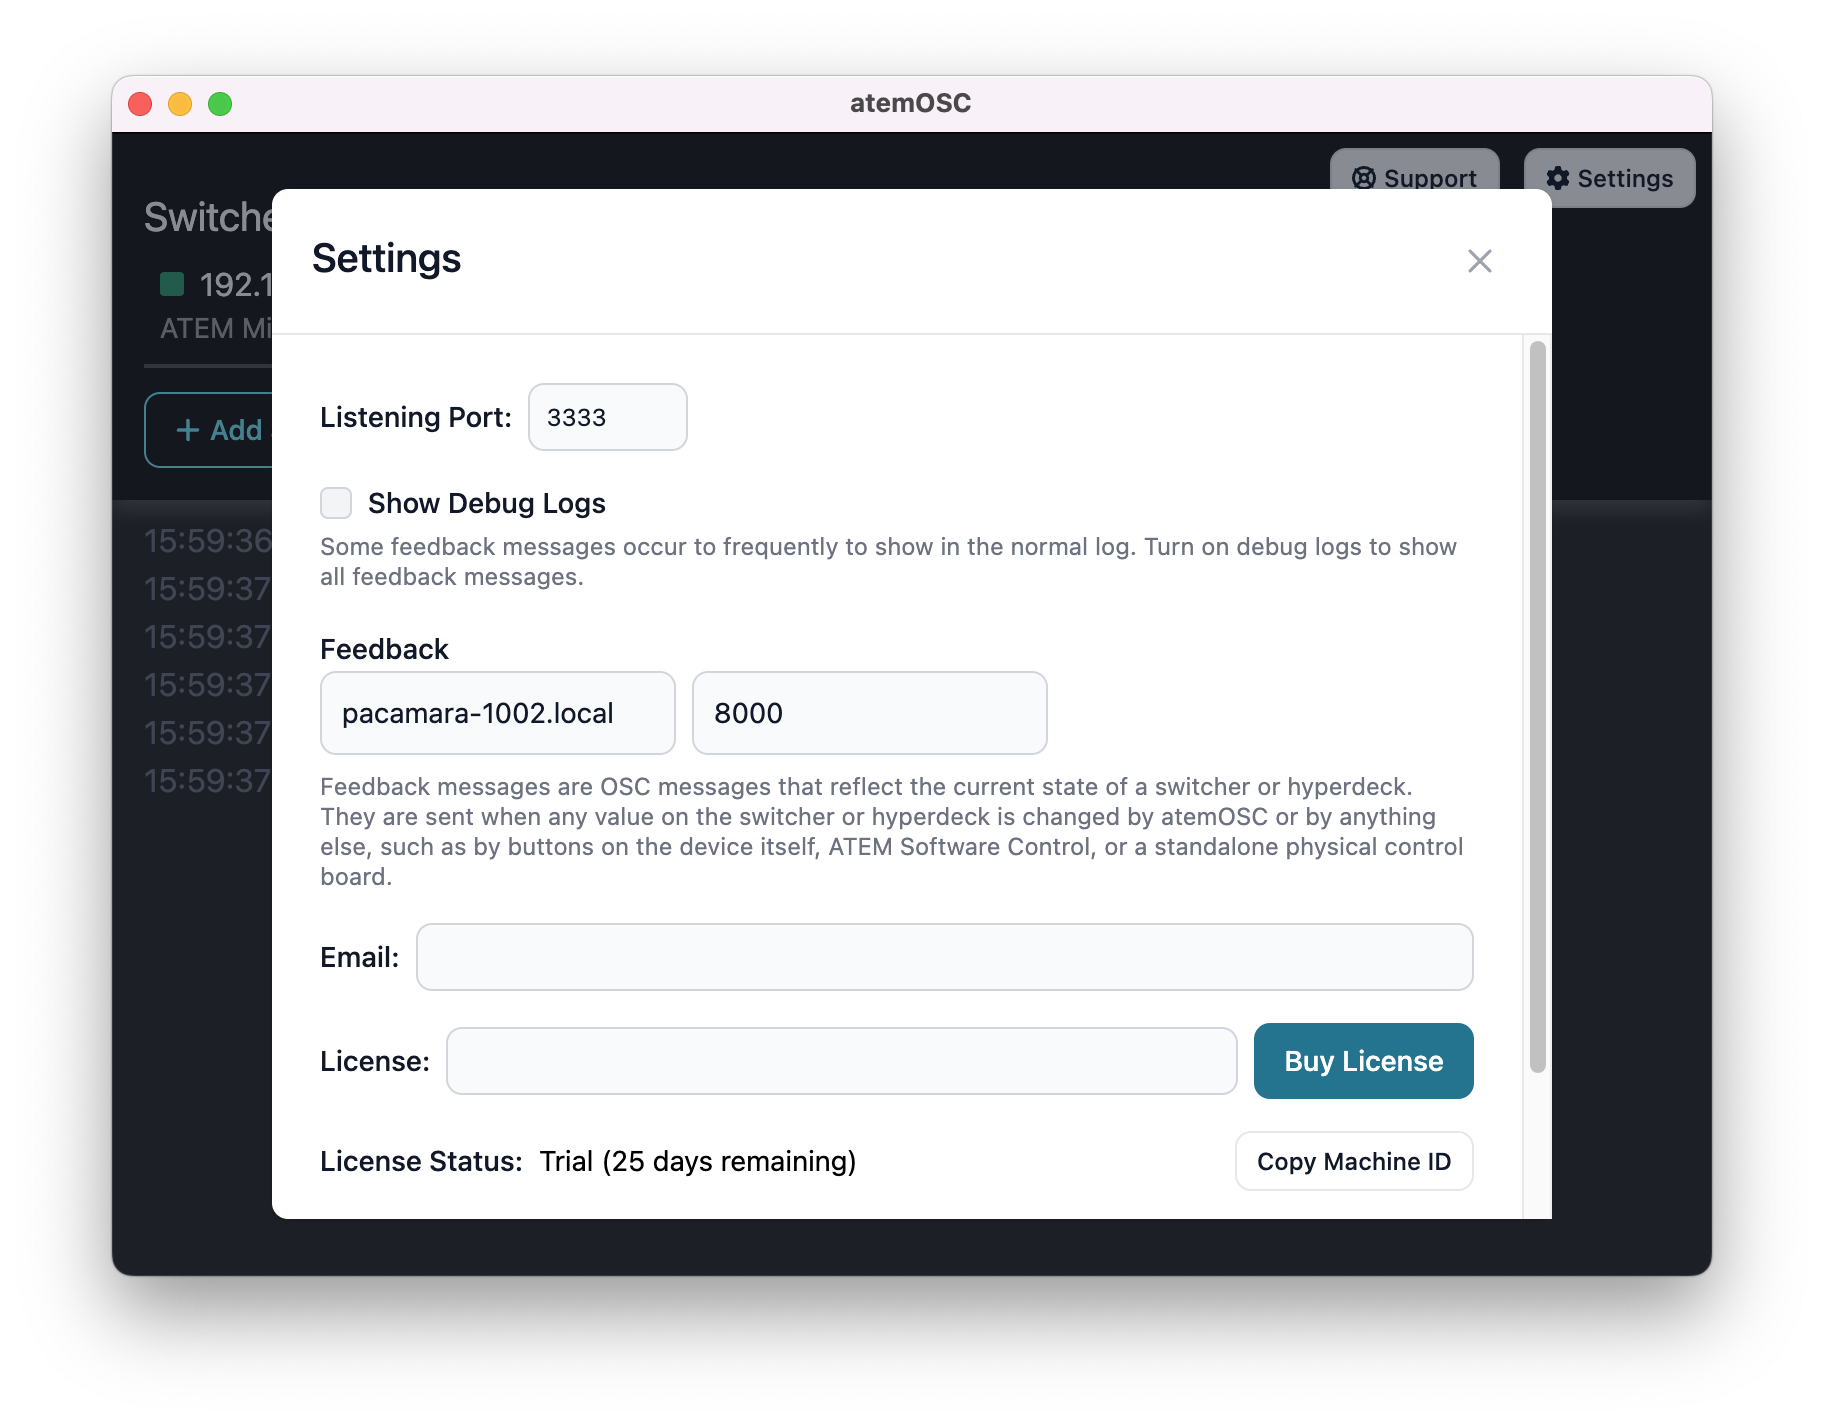
To tell atemOSC the IP address of the Pacamara, click the Settings button (upper right corner) and set the Feedback IP Address to pacamara-xxxx.local (where xxxx is the serial number of your Pacamara) and the port to 8000. These settings are constant and do not need to be updated again as long as you are using the same Pacamara. Then close the Settings window.
Go back to Kyma, check the Event Log window and write down the IP address and port number for the message from atemOSC: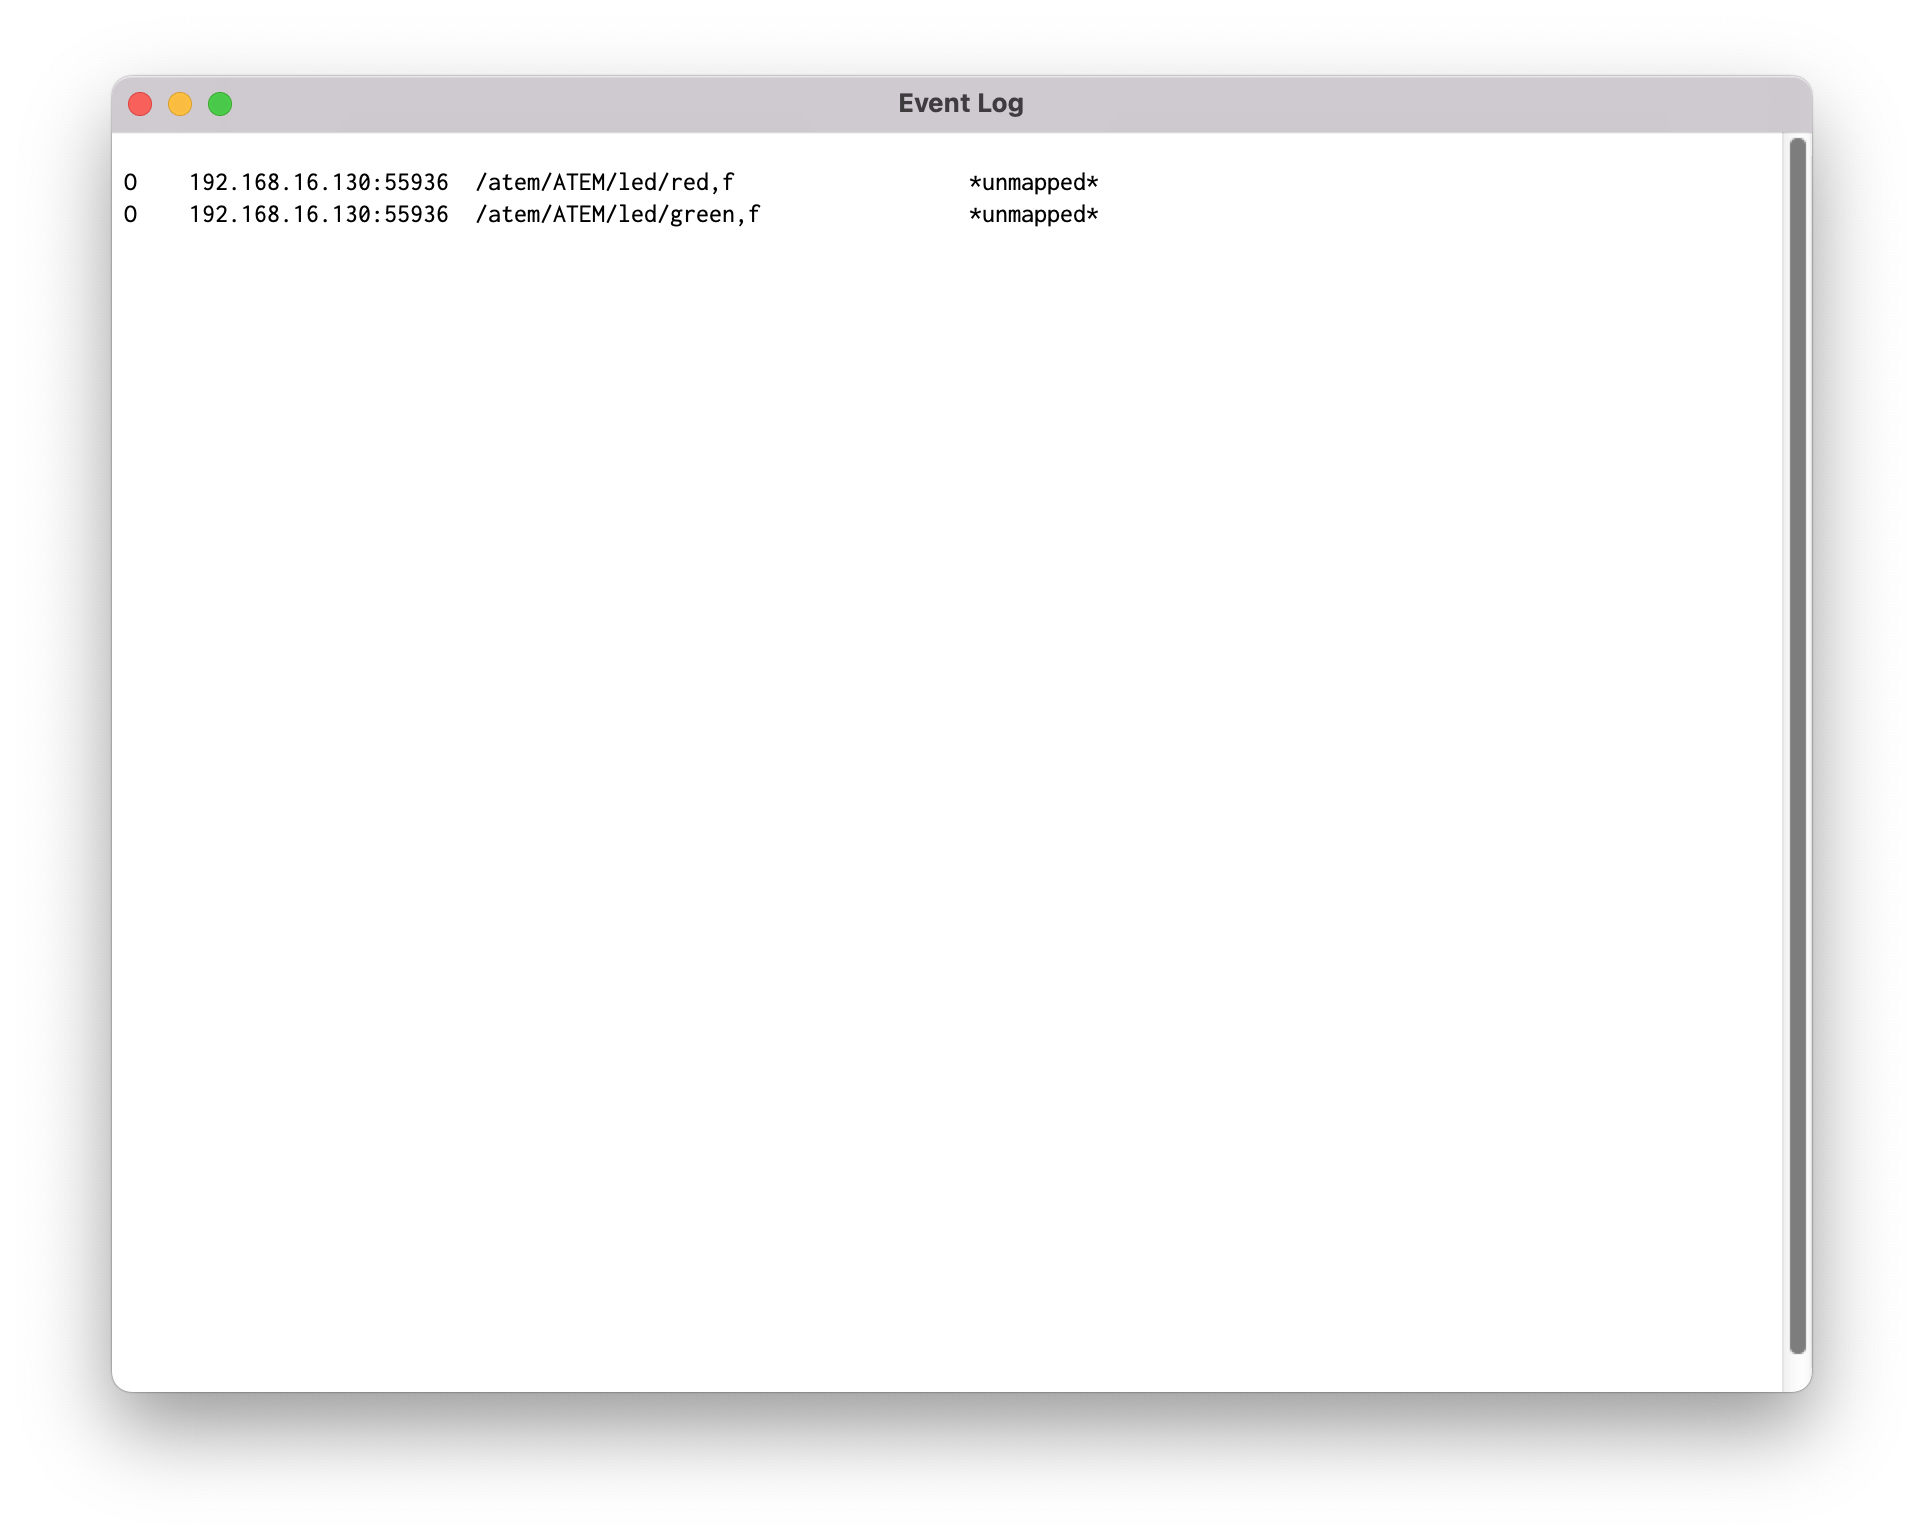
In this example, the IP address is 192.168.16.130 and the port number is 55936. These numbers could be different each time you start atemOSC.
In the Avenue ATEM OSC Configuration.kyt notebook, change the values of the variables atemOSC_IPAddress and atemOSC_SendingPort as follows (note that your IP address and port number will be different from this example):
atemOSC_IPAddress := '192.168.16.130'.
atemOSC_SendingPort := 55936.
Notice that the atemOSC_Messages variable is set to an array of OSC message strings:
/osc/receive_raw,i 1
/atem/ATEM/preview,i 1
/atem/ATEM/transition/auto,i 1
The first line tells the Pacamara not to rescale the incoming values from atemOSC. The remaining lines are the OSC messages that you plan to send from Kyma to atemOSC. In this example, we specified that we want to set the live Preview video input and to be able to switch that input to the main program output by sending the transition message. (You can see a complete list of OSC messages that atemOSC understands by clicking the i button in atemOSC.)
Select the code in the notebook and evaluate it using Control+Y (or Evaluate from the Edit menu) to tell the Pacamara which OSC messages you would like to be able to send to atemOSC.
Part 2, configure Resolume Avenue.
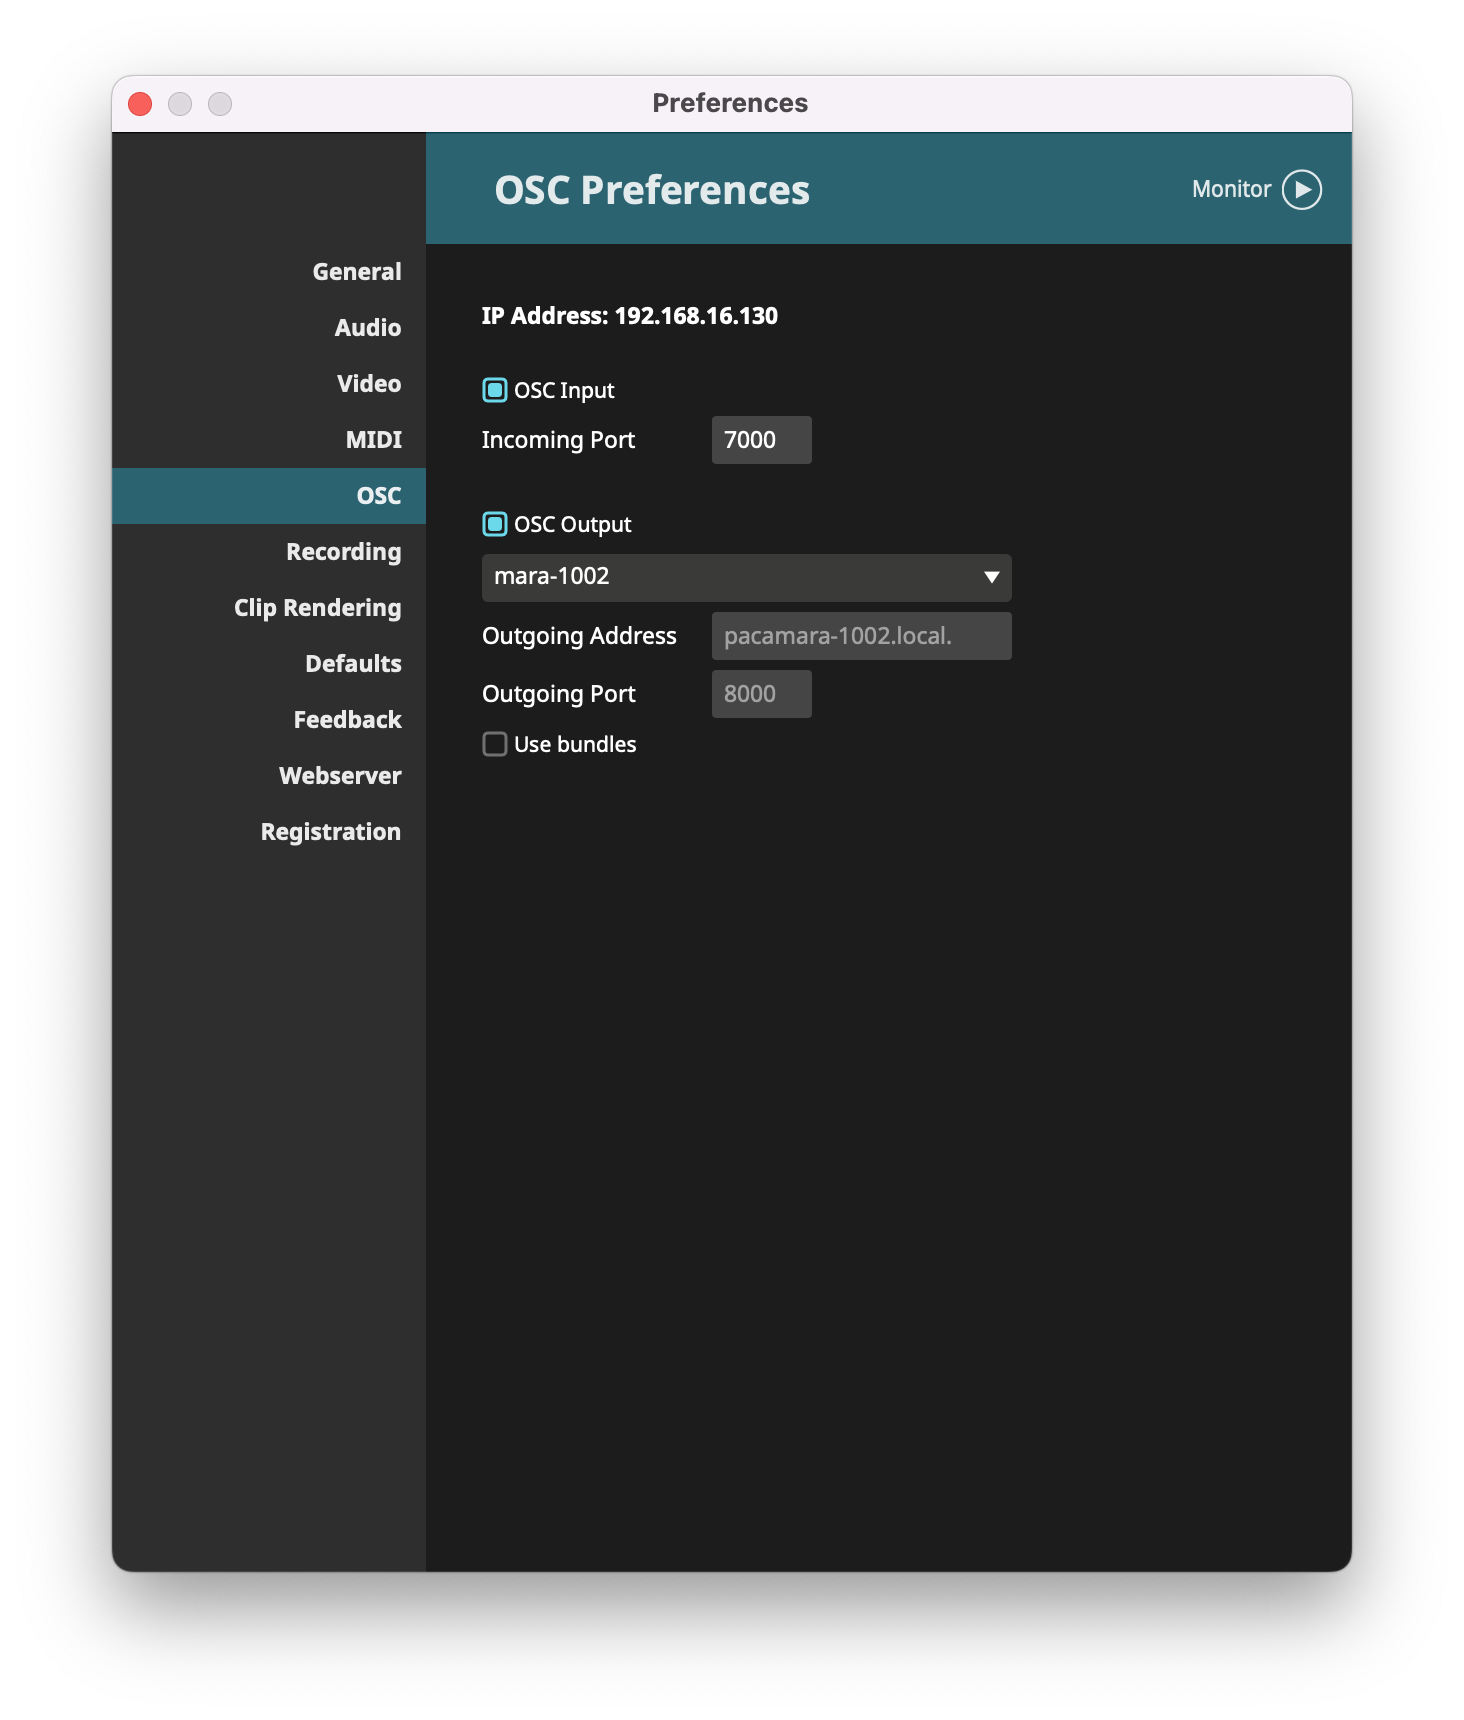
Launch the Avenue application. From the Avenue menu, choose Settings (or Preferences) and click the OSC tab. Make sure the OSC Output box is blue, and select your Pacamara from the drop down list. It will be called mara-xxxx (where xxxx is the serial number of your Pacamara). Then close the Preferences window.
In the Shortcuts menu, select Edit OSC. In this mode, each pink square shows a field that can be controlled either by the mouse or by an OSC message. When you click on a control, its corresponding OSC message is shown at the lower right in the OSC Input panel. For example, to launch clip 1 on layer 1, click on the clip in Column 1 of Layer 1 (called FogAndDust in the Resolume demo example). The corresponding OSC message is:
/composition/layers/1/clips/1/connect
and the OSC Type Tag is:
Int 0 or 1
Next, click the Layer tab to view the Layer 1 parameters. Click the Opacity control. The corresponding OSC message is:
/composition/layers/1/video/opacity
with type:
Float 0.0 - 1.0
Using the Shortcuts menu, select Edit OSC to leave the edit OSC mode.
Go back to Kyma, check the Event Log window and write down the IP address and port number for one of the many messages from Avenue:
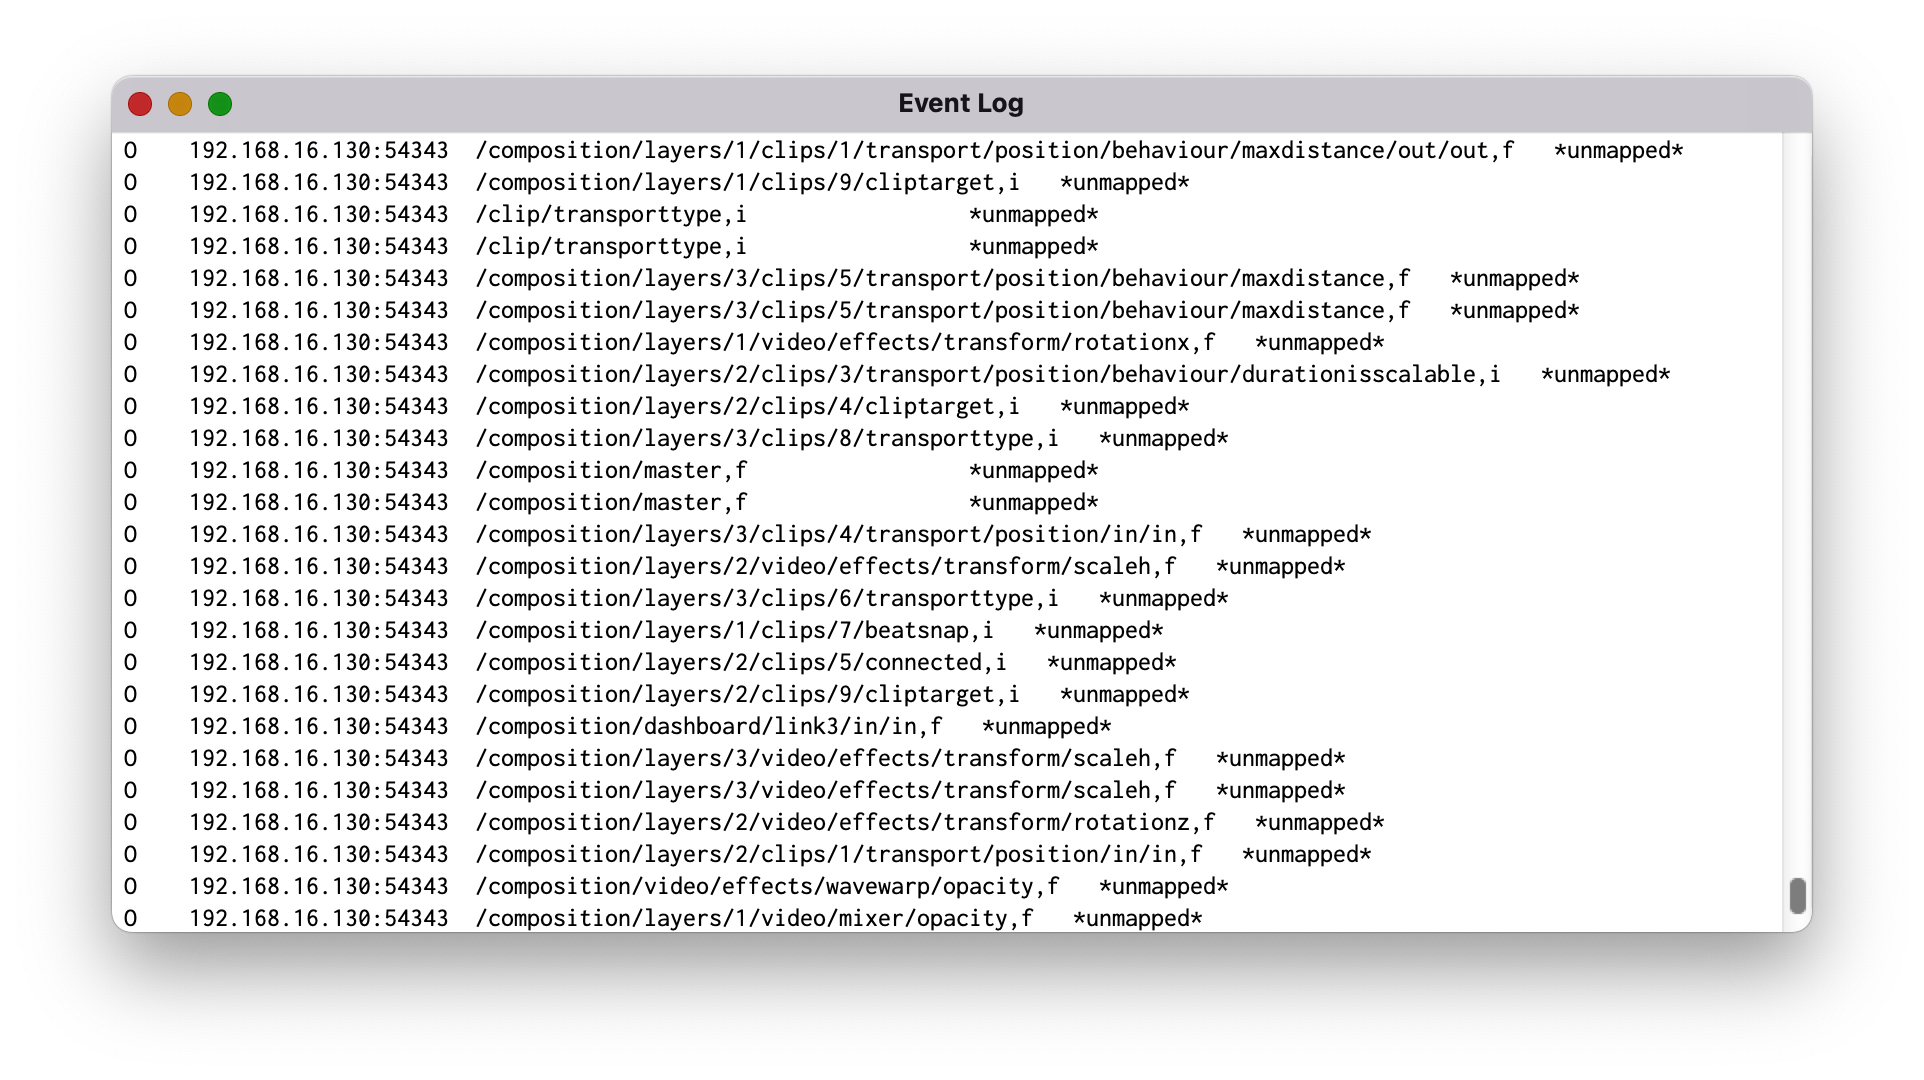 In this example, the IP address is 192.168.16.130 and the port number is 54343. These numbers could be different each time you start Avenue.
In the Avenue ATEM OSC Configuration.kyt notebook, change the values of the variables avenue_IPAddress and avenue_SendingPort as follows (note that your IP address and port number will be different from this example):
avenue_IPAddress := '192.168.16.130'.
avenue_SendingPort := 54343.
Notice that the avenue_Messages variable is set to an array of OSC message strings:
/osc/receive_raw,i 1
/composition/layers/1/clips/1/connect,i 0
/composition/layers/1/clips/2/connect,i 0
/composition/layers/1/clips/3/connect,i 0
/composition/layers/1/clips/4/connect,i 0
/composition/layers/1/clips/5/connect,i 0
/composition/layers/1/video/opacity,f 0
The first line tells the Pacamara not to rescale the incoming values from Resolume. The remaining lines are the OSC messages that you plan to send from Kyma to Avenue. In this example, we specified that we want to select five different video clips for layer 1 and change the layer’s opacity.
Select the code in the notebook and evaluate it using Control+Y (or Evaluate from the Edit menu) to tell the Pacamara which OSC messages you would like to be able to send to Avenue.
The Notebook contains example Sounds that you can use to test the connections.