PRESONUS FIRESTUDIO / FIRESTUDIO PROJECT
Install the Driver and Control Panel
Download the latest driver and control panel installer from the PreSonus website. Proceed with the installation and restart your computer when the installation is complete.
Update the Device Firmware
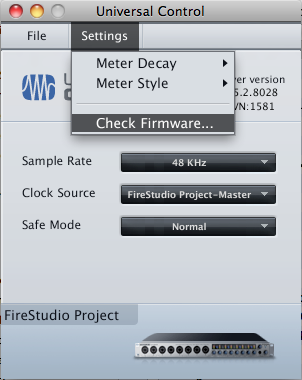
After your computer has restarted, turn on the audio interface. Start up the PreSonus FireStudio Control Panel (called Universal Control and found in the Applications folder on the Macintosh; found in the Notification Area near the bottom right corner of the screen on Windows). From the Settings menu, choose Check Firmware… to update the firmware (as shown in the image at the right); click the Update Firmware button and wait for the update to complete. Exit the control panel application, then power off the interface, wait a few seconds, and power it up again.
Configure the Inputs and Outputs
The FireStudio includes a built-in mixer for each output. By default, these mixers are disabled; if you would like to turn on the mixers and change their settings you could do so at this time.
Remove or Disable the Driver and Control Panel
To prevent the computer from taking control over the audio interface and preventing its use by the Paca(rana), it’s necessary to remove or disable the driver and control panel.
Macintosh
Unfortunately, PreSonus has not provided an uninstaller for the Macintosh. Their website gives detailed information on the uninstallation process. For convenience, you can download and double-click the following terminal script to uninstall the drivers and control panel: PreSonusUninstall.command.zip. Restart your computer after you have removed these files or run this terminal script.
In the future, should you wish to reconfigure the audio interface, you will need to re-install the driver and control panel, make the changes, and then uninstall the software.
Windows
Go to the Windows taskbar, click Start, right-click My Computer (in Vista, it is called Computer), and choose Properties.
Windows XP: If you are using Windows XP, then in the System Properties window that appears, click the tab at the top labeled Hardware and then click the button labeled Device Manager.
Windows Vista: If you are using Vista, then in the window that appears, click on the Device Manager link in the left column under Tasks.
In the Device Manager window, find the name of your audio interface driver: Presonus FireStudio Project WDM Audio. It should be located under Sound Video and Game Controllers (or it might show up under the Other Devices category). Right-click Presonus FireStudio Project WDM Audio and choose Disable. The icon should then have a red X through it (in Vista, it will have a Down Arrow next to it). This will prevent Windows from taking control over your audio interface. Finally, turn off the audio interface.
In the future, should you wish to reconfigure the audio interface or to use it with your computer instead of with your Paca(rana), repeat the steps in this section, selecting Enable rather than Disable.
PRESONUS FIREBOX
Do not install any FireBox drivers on your computer. If you have already installed the driver, remove it using the uninstall option on the Macintosh (or Disable it in Windows).
You can just plug and play, no drivers are needed.
Special note for Windows XP users
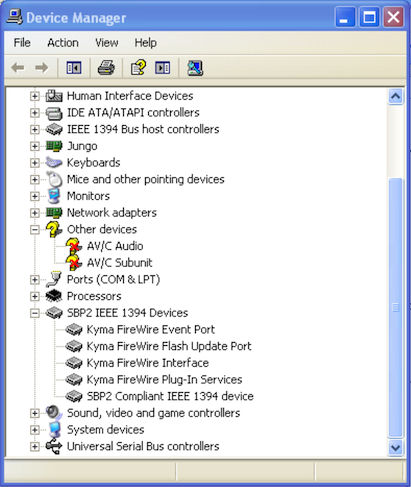
Windows XP partially installs drivers for the FireBox that cause the Paca(rana) audio stream to drop-out when Kyma is in use. Please disable the AV/C Audio and AV/C Subunit devices from the Other devices category in the Device Manager (see below) to correct this problem. To do this, select each device in the Device Manager, right click the mouse, and choose Disable from the pop-up menu.

