To route audio and/or MIDI data to your computer, connect the Pacamara USB-C port to a USB port on your computer. Then, using the DSP Status window in Kyma, select Host USB as the source and destination of audio and/or MIDI data.
 From the point of view of applications running on the computer, the Pacamara appears as an audio and MIDI device. (An alternative approach to integrating the Pacamara into your studio or live performance rig is to use a digital mixer as the audio interface for the Pacamara).
On the computer, the Pacamara appears as an audio interface named “Pacamara”. Audio routing, recording, synthesis and processing software on the computer can now receive audio inputs from the Pacamara and/or send audio to the Pacamara for processing.
Configuring the Pacamara virtual audio interface
To set the sample rate of the Pacamara, use the computer’s audio control panel app (see specific instructions for your computer, below). NOTE: For minimum latency, the sample rate should be a multiple of 48 kHz (48k, 96k, 192k).
To set the number of audio input and output channels, select Pacamara from the Configure dropdown menu at the lower left of the DSP Status window (see below).

Use the drop-down menus in the Pacamara Configuration window to select the number of Host USB audio input and output channels and then click the Apply button. Kyma will restart the Pacamara; the selected number of audio channels will be available after the restart.

Configuring the Pacamara virtual audio interface: macOS
The sample rate of the Pacamara is initially set to 44.1 kHz on macOS. For consistent low latency, it is recommended that you change this to a multiple of 48 kHz. To change the sample rate:
- Launch Audio MIDI Setup (found in the Utilities folder of the Applications folder)
- Select Pacamara
- Select the desired sample rate from the drop down menu
- For best results, select the same sample rate for both the Pacamara and the audio software that will be working with the Pacamara’s audio stream (so the host does not have to re-sample)

More than one hardware input or output: macOS
Some audio applications can only work with a single audio source or destination. If you want to use multiple external hardware devices at the same time, create an aggregate device; in an aggregate device, all of the aggregated devices appear as separate channels of a single virtual aggregate device.
For example, to send audio to both Kyma and to another device (for example, you might want to route audio from a DAW through Kyma and, at the same time, send the audio to the audio interface attached to your computer), do the following:
- Launch Audio MIDI Setup (found in the Utilities folder of the Applications folder)
- Click the plus (+) in bottom left corner to create an aggregate device

- Select the audio devices that make up aggregate device by clicking the appropriate box in the Use column
- For best results, select your audio interface as the Clock Source and click the Drift Correction box for the Pacamara

Configuring the Pacamara virtual audio interface: Windows
The sample rate of the Pacamara is initially set to 44.1 kHz on Windows. For consistent low latency, it is recommended that you change this to a multiple of 48 kHz. To enable the Pacamara and change its sample rate:
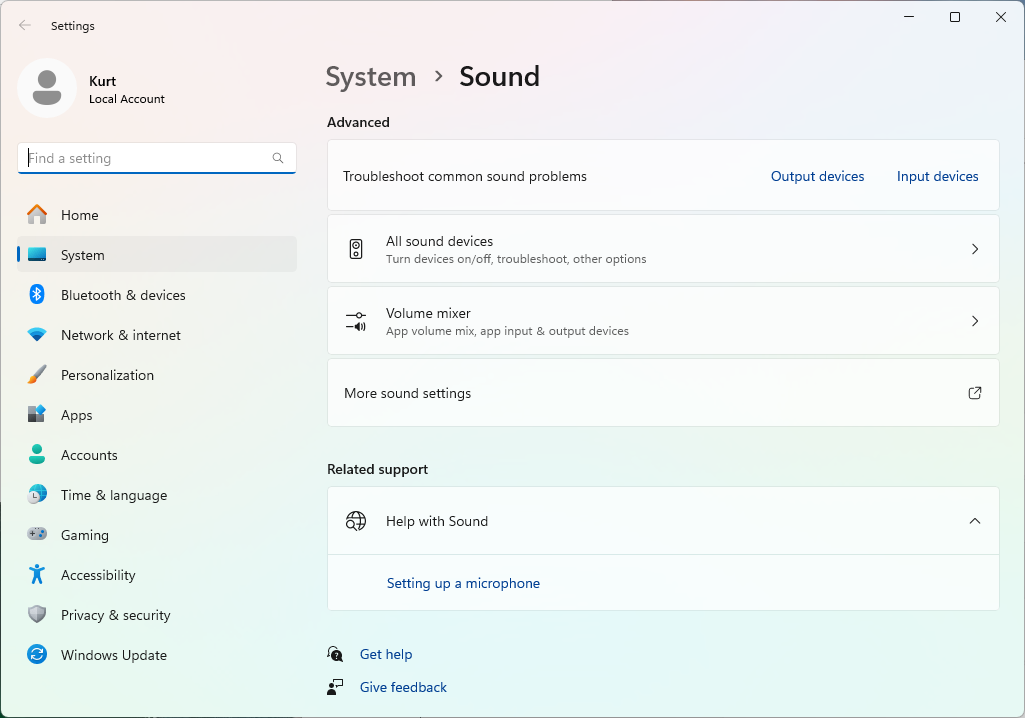
In Settings, select System, then select Sound. Scroll down to the Advanced section, and click All sound devices (see below):
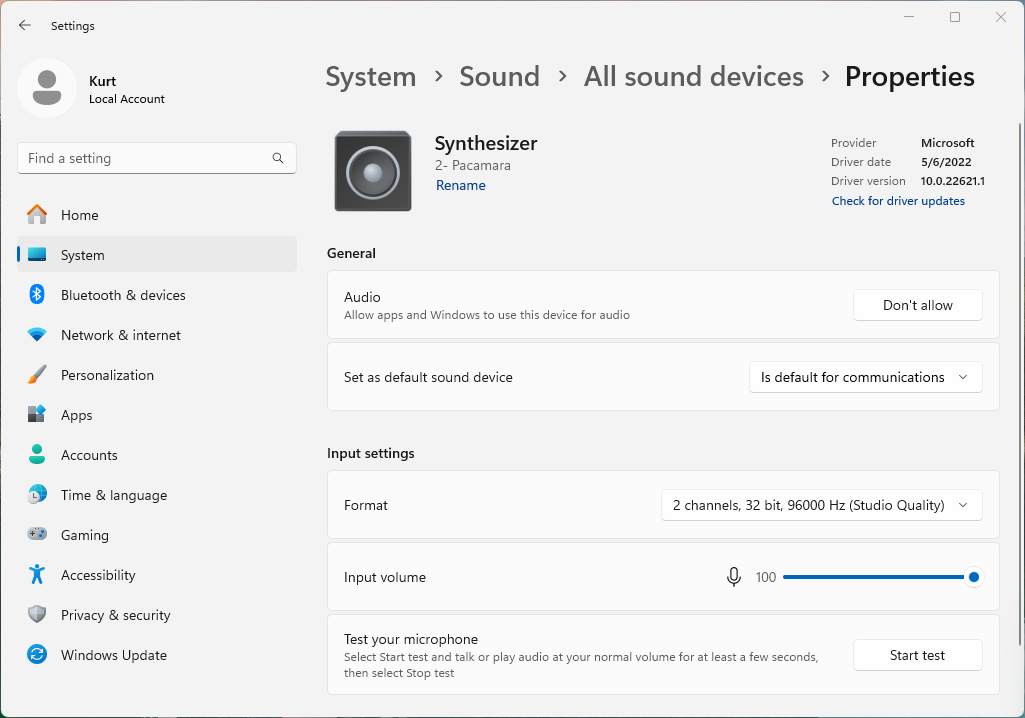
From the list of sound input devices, select Synthesizer with Pacamara as the subtitle (see below). In the General section, Audio setting, if it says “Allow” click the button to allow Windows and other apps to receive audio from the Pacamara. (If it says “Don’t allow”, leave it in its current state).
Under Input settings, use the Format drop-down list to set the sample rate (multiples of 48000 Hz are recommended for consistent low latency):
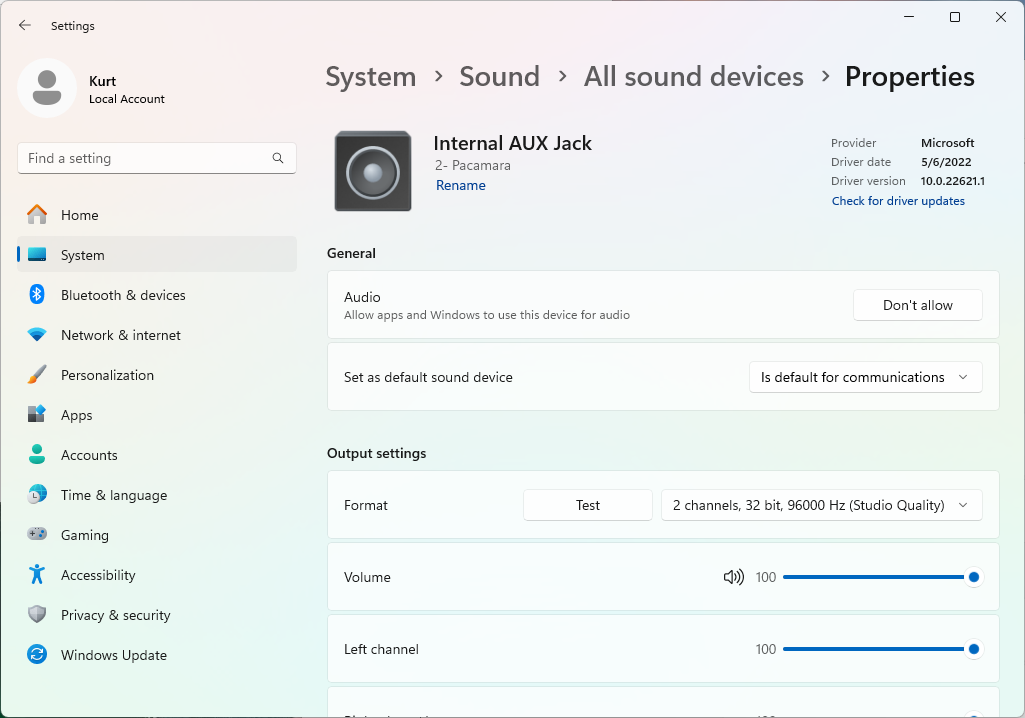
 From the list of all sound output devices, select Internal AUX Jack (Pacamara); see below. In the General section, Audio setting, if it says “Allow” click the button to allow Windows and other apps to send audio to the Pacamara audio. (If it says “Don’t allow”, leave it in its current state).
Under Output settings, use the Format drop-down list to set the sample rate (multiples of 48000 Hz are recommended for consistent low latency). You should use the same sample rate for both input and output:
More than one hardware input or output: Windows
Some audio applications can only work with a single audio source or destination. If you want to use multiple external hardware devices at the same time, create an aggregate device; in an aggregate device, all of the aggregated devices appear as separate channels of a single virtual aggregate device.
For example, to send audio to both Kyma and to another device (for example, you might want to route audio from a DAW through Kyma and, at the same time, send the audio to the audio interface attached to your computer), do the following:
- Download and install VB-Audio Matrix
- In the Windows Devices section, right+click WIN1.IN to select the Synthesizer (Pacamara) as input
- In the Windows Devices section, right+click WIN1.OUT to select the Internal AUX Jack (Pacamara) as output
- For more detailed instructions on routing and combining other interfaces, see the VB-Audio site.
Optional audio routing apps
In audio applications running on the computer, Pacamara appears as a menu option in the preferences or configuration settings for that application, so you can designate the Pacamara as the source and/or destination for up to 8 audio channels.
If you need more than one audio source or destination (for example, in order to process audio signals from the computer through Kyma while also listening to the audio through the computer’s audio interface), you may find it useful to install an additional audio routing audio application on your computer.
To find audio routing apps, try searching for “route audio between applications” in a web browser. Here are some examples:
- macOS: LadioCast by Yosirou Sawayanagi (stereo output only)
- Windows: VoiceMeeter and VoiceMeeter Banana
- Windows: ASIO4ALL, see the ASIO4ALL instruction manual
- macOS & Windows: Dante Via
- Windows: Jack
- macOS: Jack
Using the Pacamara as an External Effects Plugin in a DAW
Most DAWs include a plug-in that allows you to use external (hardware) effects processors within a track’s device chain (in Ableton Live, for example, the plug-in is called External Audio Effect).
Use the following steps to set up the Pacamara to act as an effects processor for your DAW:
- Create an aggregate device made up of the Pacamara and your computer’s audio interface, using Audio MIDI Setup or its Windows equivalent (see above)
- In the DAW, use the newly created aggregate device as the DAW’s audio interface
- In the external audio effect plug-in, choose the inputs and outputs of the aggregate device that correspond to the Pacamara’s inputs and outputs